Light Fall – Off

Light Fall – Off

If you’ve been following my articles it should come as no surprise that I’m a huge fan of off-camera flash.

Speedlights are a lot more portable than their studio-dwelling cousins, and the fact that they are sources of light which are incredibly easy to experiment with has dramatically improved my understanding of light and lighting.

In this article I will be delving into one particularly important principle of light – Light fall-off.

The way in which light intensity diminishes as the distance from the light source increases has immense practical implications for photographers.

Believe it or not, you actually know a lot more about this than you think.

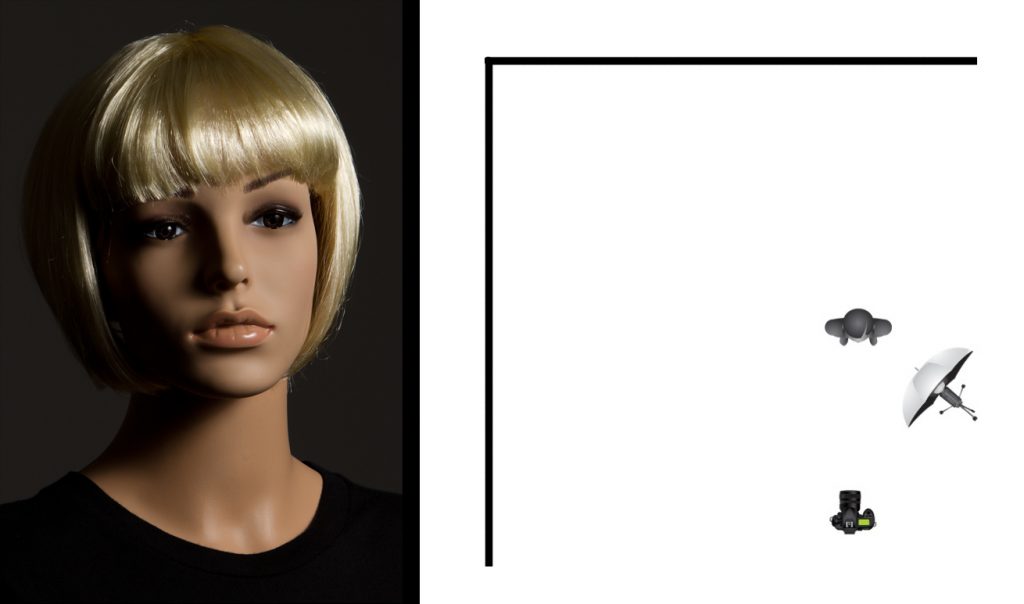
Imagine a dark room. In this room a spotlight is shining on a wall 1m away. What would happen if we moved that light another metre away from the wall? (Double the distance)

No points for knowing that the light shining on the wall won’t be as bright.

The question is, by how much will that light intensity have dropped?

Seeing as we’ve doubled the distance you would be forgiven for thinking that the light  intensity would be halved. However, you would be wrong. It would be reduced to 1/4 of what it was.

This relationship between light intensity and the distance between light and subject is governed by the Inverse Square Law.

The Inverse Square Law

“The intensity of light radiating from a point source is inversely proportional to the square of the distance from the source.”

Simply put, if we double the distance (ie increase it by a factor of 2), we reduce light intensity to 1/4 of what it was.(Distance = 2. Inverse = 1/2. Squared = 1/2 x 1/2 = 1/4)

By the same formula, if we triple the distance we reduce light intensity to 1/9th of what it was.

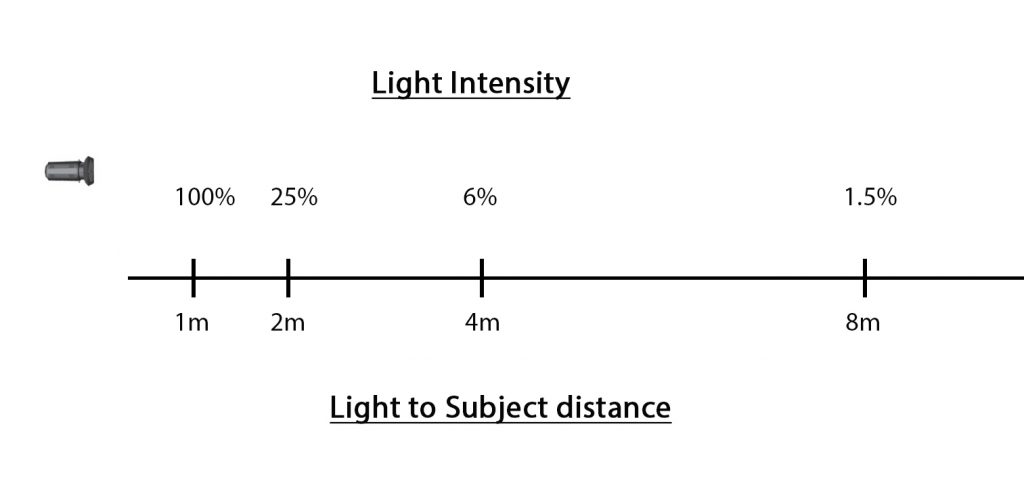
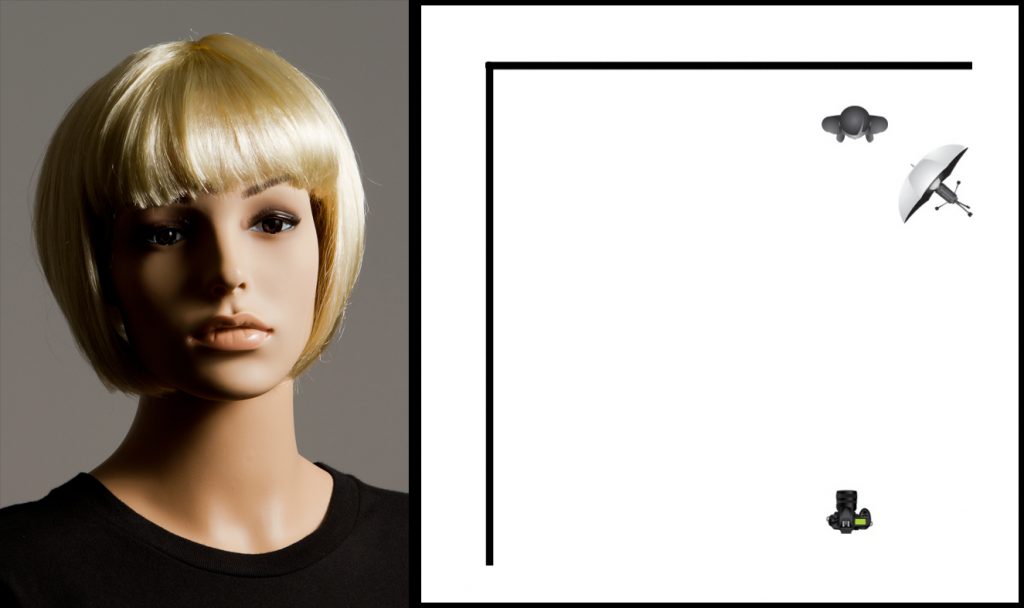
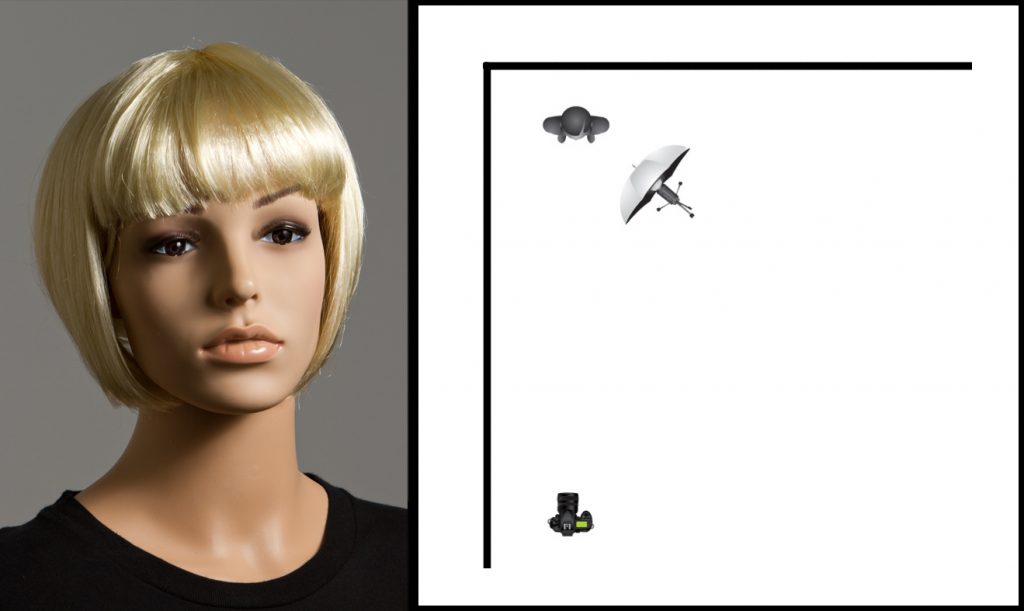
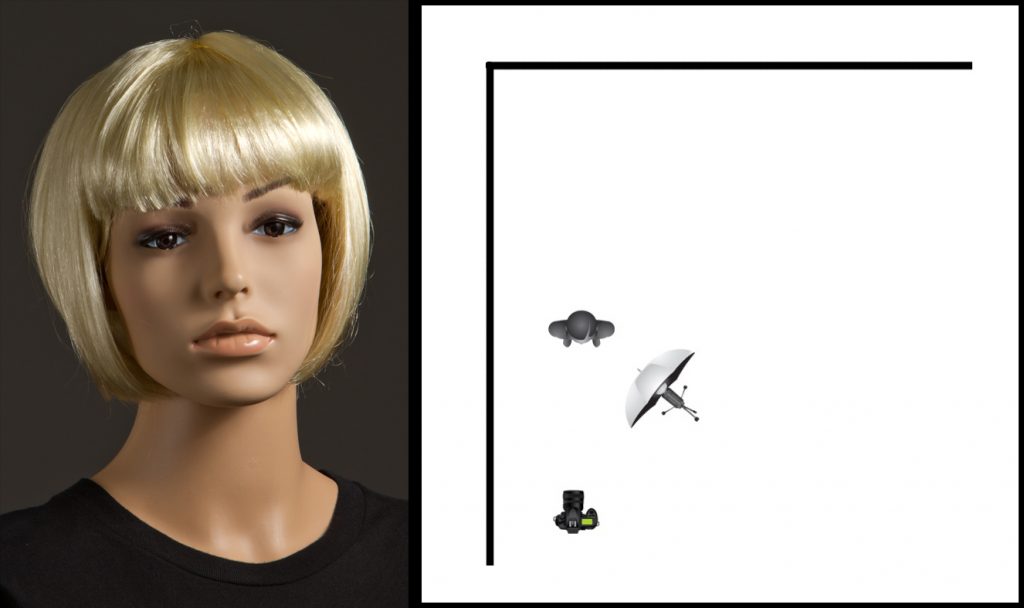
The diagram below illustrates how light intensity changes with increased distance from the light source.

Let’s use the light intensity at 1m as our starting point. Call it 100% to make this easier.

If we double the distance from the light (1m – 2m), we reduce the light intensity to 25% of what it was at 1m away.

If we double the distance again (2m – 4m) we lose another 75% of our light. (25% – 6.25%)

Once again we double the distance from the light. (4m – 8m) Once again we lose 75% of our light intensity. (6.25% – 1.5%)

What I want you to see here is that, in the first metre, we’ve lost 75% of our light intensity, but in the next 6m we lose only 23.5% of the intensity we had at 1m from the light.

The key point? Light falls off RAPIDLY closer to the source.

Take a look at the next image and you’ll see this visually.

What I’ve done here is use a light metre to mark out f-stops along the wall.

Each gap represents a difference of 1 stop of light (ie a halving of light intensity)

Notice that as we get further from the light, the distance that represents a 1 stop loss gets progressively bigger.

A Few Practical Implications.

1) Shooting groups and getting an even spread of light.

If your light is too close to who you’re shooting, you may end up with a marked difference in exposure between the front and back of your group because of rapid light fall-off.

The way to correct this is to move your light far enough away from your group so that there is negligible fall-off between the people in the front and those in the back. Obviously this will require some adjustment to be made to maintain the same exposure. (More flash power/Higher ISO/Wider aperture)

2) Varying the colour of a white backdrop.

3) Adjusting fill light with reflectors.

This image was shot against a white wall. Because there is a relatively large distance between the mannequin and the wall, the light has fallen off dramatically by the time it hits the wall. Consequently, the wall looks black. 

So what happens if we move closer to the back wall?

We’ve allowed more light to hit the wall. Granted, not enough to show that the wall is actually white, but enough to dramatically change the look of the background.

Let’s move closer to the side wall

What you’ll notice, is that the right side of the mannequin’s face has lightened up.

Essentially we’ve used the side wall as a reflector. Light has to travel from the flash to the side wall and reflect back on the model. In this case, that distance is MUCH shorter than our previous example, and consequently less light is lost before it hits our model again.

Now let’s move away from the far wall again, but keep the same distance from the side wall.

Once again our background has gone dark because of the distance, but as we’re still close to the side wall it is still acting as a reflector.

This principle is important to remember when using circular reflectors – you can vary the amount of fill light by simply adjusting the reflector’s distance from your subject.

In my next article I will be talking about the practical aspects of using flash for action photography – in particular the use of high-speed/focal-plane sync and the numerous problems that need to be successfully navigated to produce a good image.

Understanding light-fall off and the fact that small flashes are often extremely ineffective at distance is key to my next piece.

Until next time – Happy flashing!